
Parts required
12v/1.2w lamp
Tools required
- Phillips screwdriver
- Thin nose pliers
Steps
(1) Remove ashtray inner section (by lifting out)
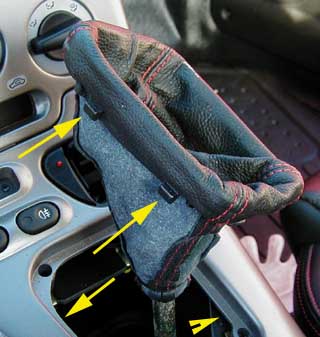
(2) Remove the gear stick gaiter by pressing the centre of the surround in toward the gear stick then lifting. It is held by 4 lugs shown in the picture
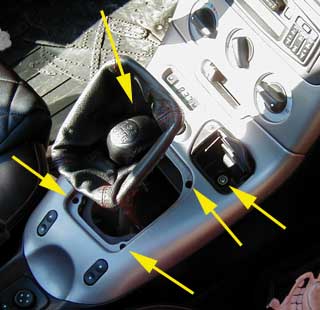
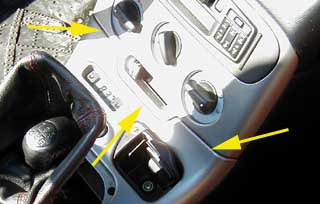
(3) Remove the 5 screws shown by yellow arrows. Lift out the ashtray and remove the LED (by pushing it through the panel). Lift the console panel from the handbrake end to release it
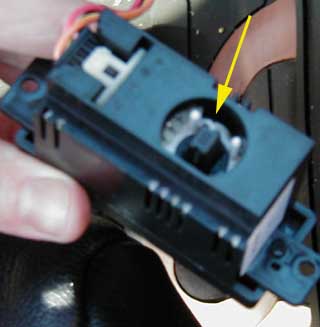
(4) The bulb holder is located at the base of the clock as shown, it can be released with a quarter turn (you may need some pliers to grip it)
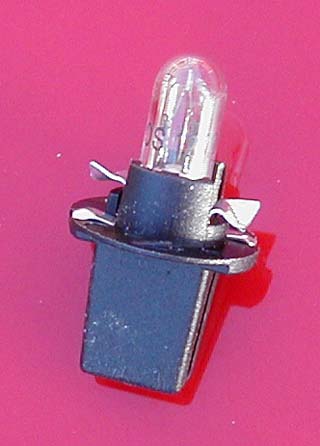
(5) Remove the old bulb from the holder by pulling it and insert the new one
(6) Put everything back together in reverse order, make sure you locate the 3 panel lugs correctly when refitting the console panel
This technical guide was originally held at http://www.fiatbarchetta.com/btech/clkbulb.html. It was copied to this site in 2021 to ensure its availability and to reformat it into a more modern layout. The original guide was written by Ian Barnett.
