
Overview
The fabric on the widshield is a common point of failure, however material to repair this is easily found. There are a few different designs of windshield around but hopefully the steps shown below will give you the confidence to attempt this repair whatever type you have.
Tools required
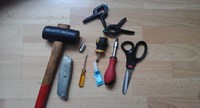
- Rubber mallet
- Stanley knife
- Scissors
- Screwdrivers
- Clamps
- Block of wood
- Appropriate sized socket
Parts required
You will need to source replacement windshield fabric. The author sourced their’s (in 2023) from:
ACTION AUTOMOTIVE LTD t/a FLYSCREEN QUEEN
PHASSOURI HOUSE, SCHOOL ROAD, BRADENHAM Norfolk IP25 7QU
01760 441423
info@flyscreenqueen.co.uk
http://www.flyscreenqueen.co.uk
The minimum order is 1m, price £15. The actual material is 1.2m wide which will make 3-4 replacement panels depending on how it is cut.
Steps

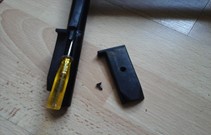
- Remove the lower cover.

- Unscrew both stops.
- Tease up the rubber centre section, pay attention to where it meets the lower rubber. It becomes weak at this point and the lower section at both ends is glued.
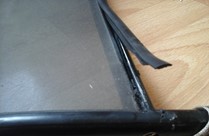
- Once past this point the rubber can easily be pulled out.
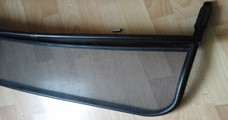
Stretch out the new material over the frame, use the clamps to hold it in place while you do so. I started with the bottom rubber, at this point only push in every 10-15 cm until you’re satisfied that the material is taut and the rubbers are in the correct position.
Finish by using the mallet to tap the rubber securely into the groove all the way round. I used a wooden block to raise and support the frame which helped to hammer in the rubber.

- Re-glue the two ends of the lower frame.
- Finally, and very carefully, trim with a Stanley knife any material left hanging out of the frame.
- Re-attach the two stops and lower cover.
