
Overview
It was only when reading the Fiat Forum I realised that lifting the hood wasn’t supposed to be part of a weight-lifting routine but should be assisted by gas struts. The ones in my car were completely useless and offered no help in lifting the hood.
I used the guide on the Fiat Forum to help me but I’ve added a few details and photos of my own to produce this guide. My guide assumes you can source the correct struts as detailed below. The guide on the forum offers help in adapting differing struts to suit.
It took me about 30 minutes to complete the job and it is now definitely easier to lft the hood.
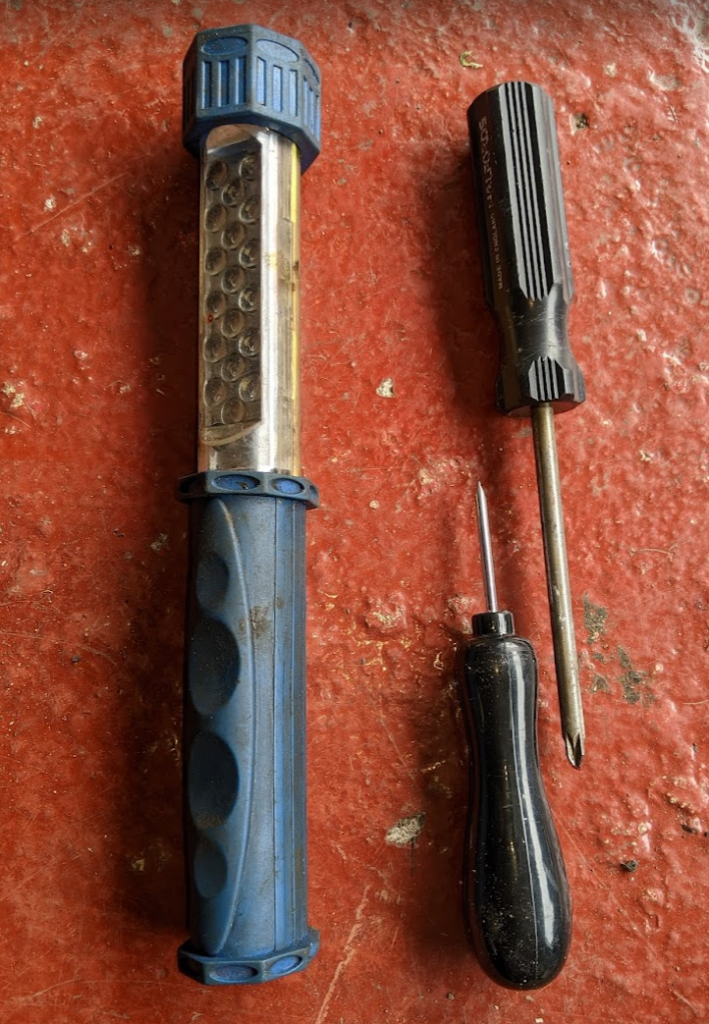
Tools required
- Cross-headed screwdriver
- Thin screwdriver or bradawl
- Torch, I’d recommend a head torch as there’s a fair bit of peering in the dark
Spares required
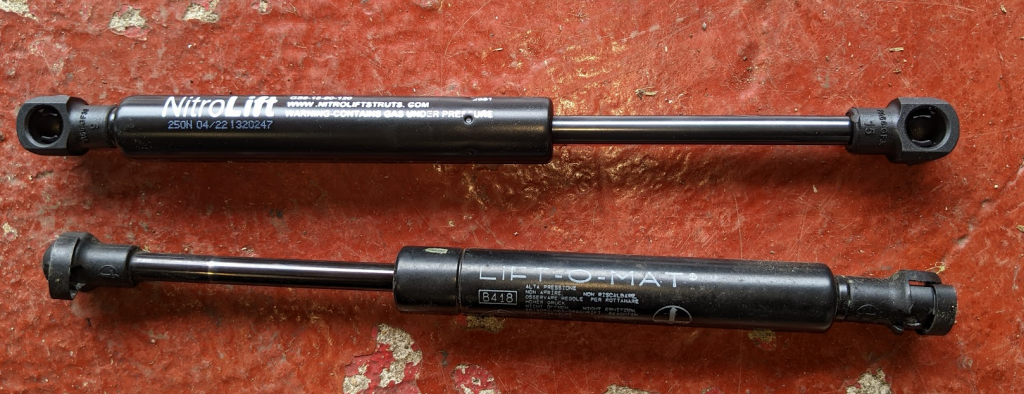
The strut is part number 46734809 and can be found on drawing 1 of section 70701/00 of ePER, you’ll need two of them, one for each side. I bought mine from SGS engineering who (in 2022 at least) could supply both boot strut and struts for the folding roof.
Steps
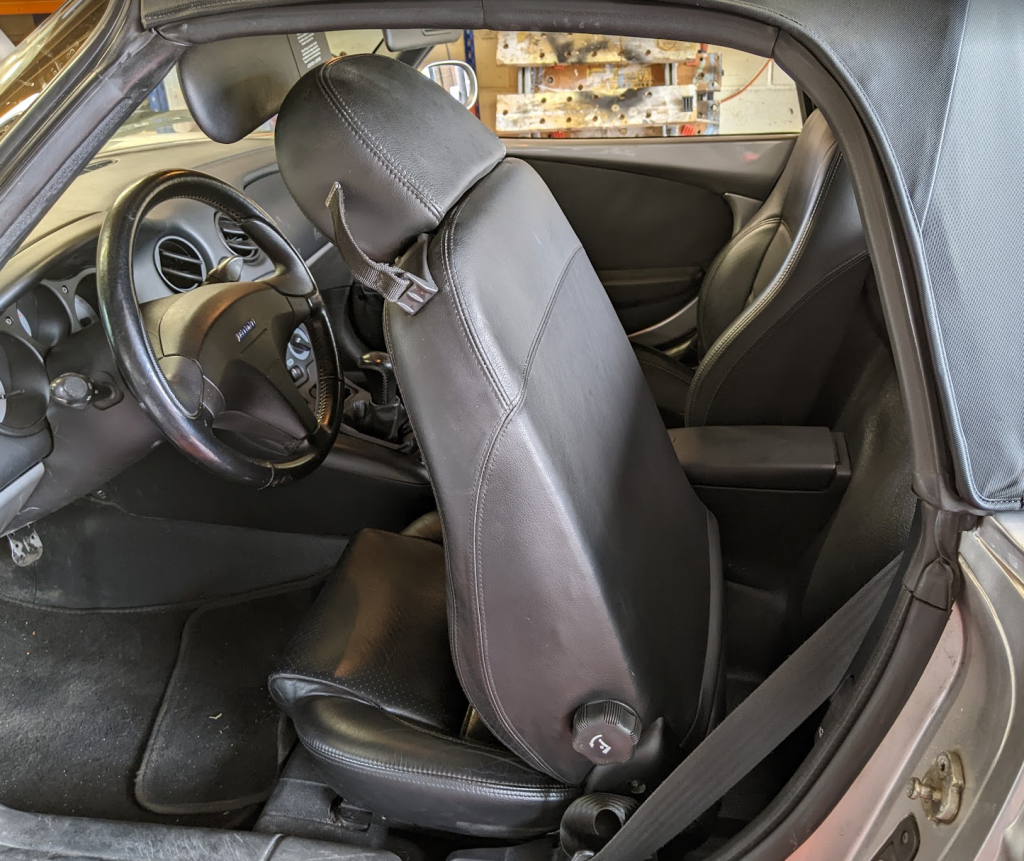
- To do this job you will need the roof up so that the existing struts are extended fully.
- It is also easier to have the seat as far forward as possible and reclined forwards
- The seat belt gets in the way when doing this job so I unhooked it from the seat and wrapped it around the lid of the cubby box to keep it to one side.
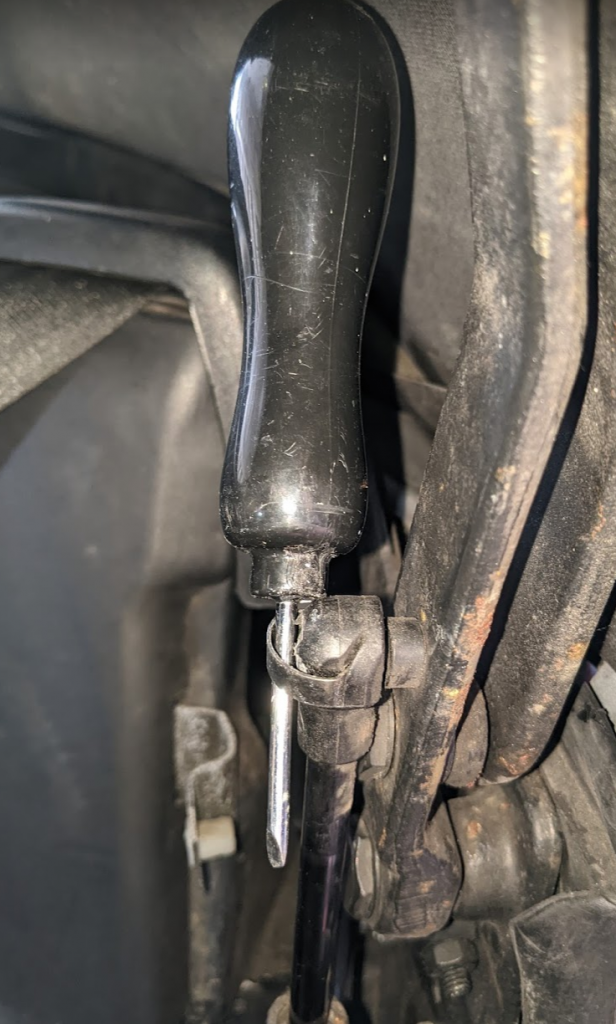
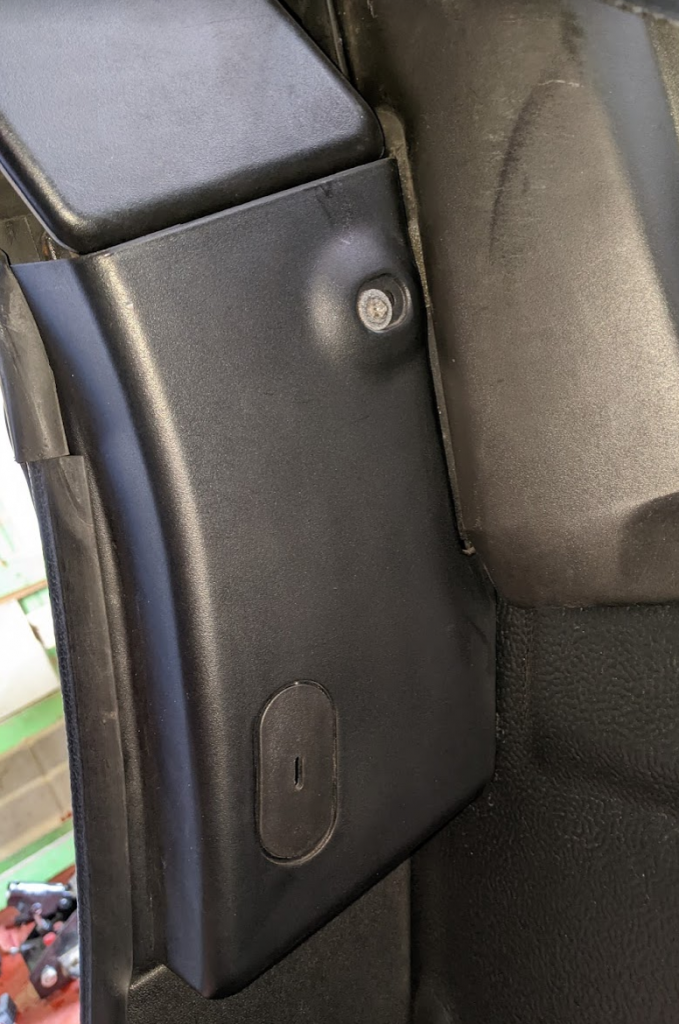
- You now need to get the piece of trim that covers the strut out of the way. It is held in place by two cross-headed screws, ringed in red here.
- If you are lucky then you still have a piece of trim that covers the lower screw, this easily unclips so that you can access the screw.
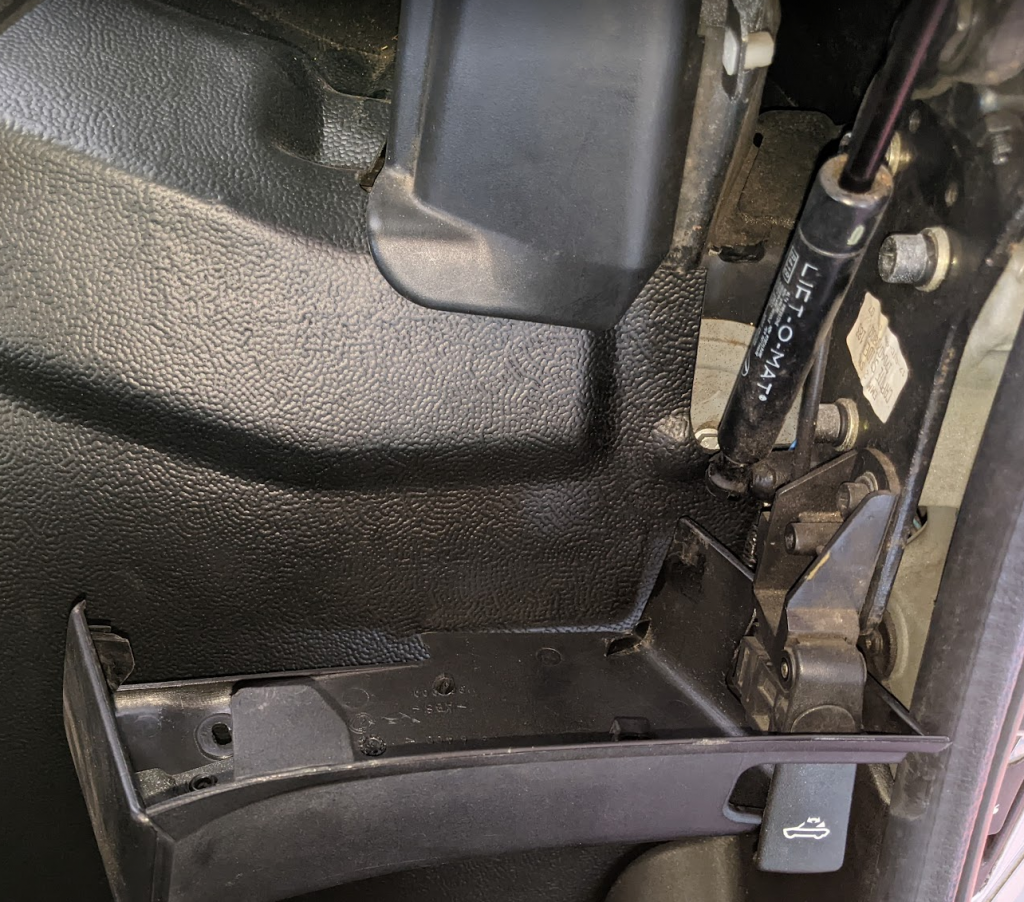
- Part of the trim is held in place by the door seal so you will need to lever it out from under there.
- On the drivers side the handle to open the tonneau cover makes it hard to completely remove the trim so I just tilted it out of the way. There’s probably a knack to removing it but I always feel I’m about to break it so left it in place.
- You can now remove the old strut, these are held in place by metal clips that are part of the strut
- I used a bradawl to lever the clip away from the strut which could then be pulled away from its fixing
- I was able to remove the lower part of the strut by just pulling it off but if yours is stubborn then the bradawl can be used again
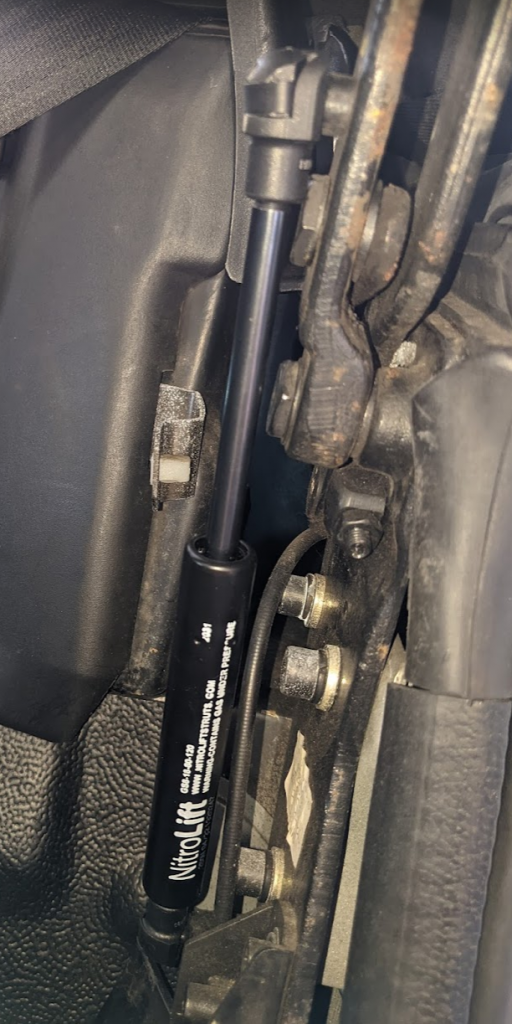
- The new strut should just snap on to the fittings
- I did the bottom first which pushed on easily.
- The upper one was harder and I ended up part closing the roof in order to have the strut and fixing line up better.
- Now the trim piece can be put back on.
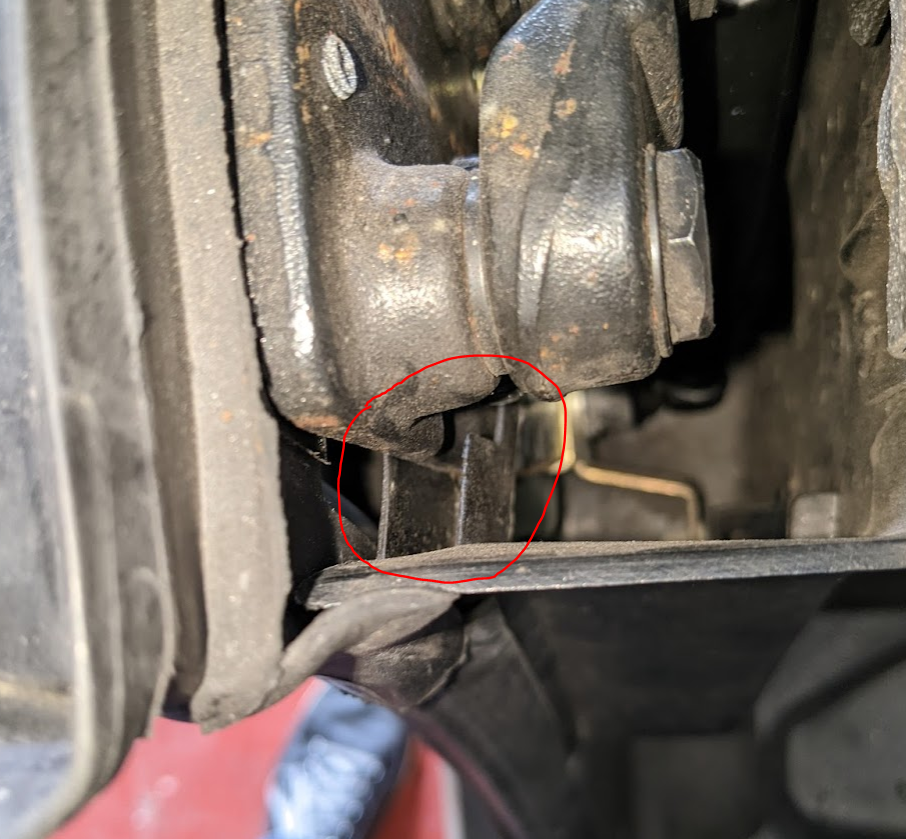
- One key thing to note is that there are two plastic prongs on the inside of the trim that need to go either side of the metal piece shown ringed on the diagram. You will be able to get it back in place if you don’t do this but the trim won’t sit quite right. This picture is of the passenger side.
- You’ll need to peel back the door seal slightly to tuck the trim piece back underneath.
- Now repeat the process on the passenger side. The trim piece is easier to remove as it doesn’t have the tonneau release lever in the way.
